The Community Members page is your community's member directory. This article covers the tools Community Leaders use there: the leader-only tabs, inline and bulk role changes, invitations, export, and printing. For the resident view of the same page, see Finding Your Neighbors in the Member Directory.
Anyone with the View Active Members permission can open the page, and residents have it by default. The tools below each need their own permission, listed in each section. Community Admins and Community Leaders have all of them by default.
Some options may be unavailable or appear differently depending on your level of account access.
Log in to Communitrak at https://app.communitrak.com.
In the main navigation menu, expand Members & Groups and click Community Members.
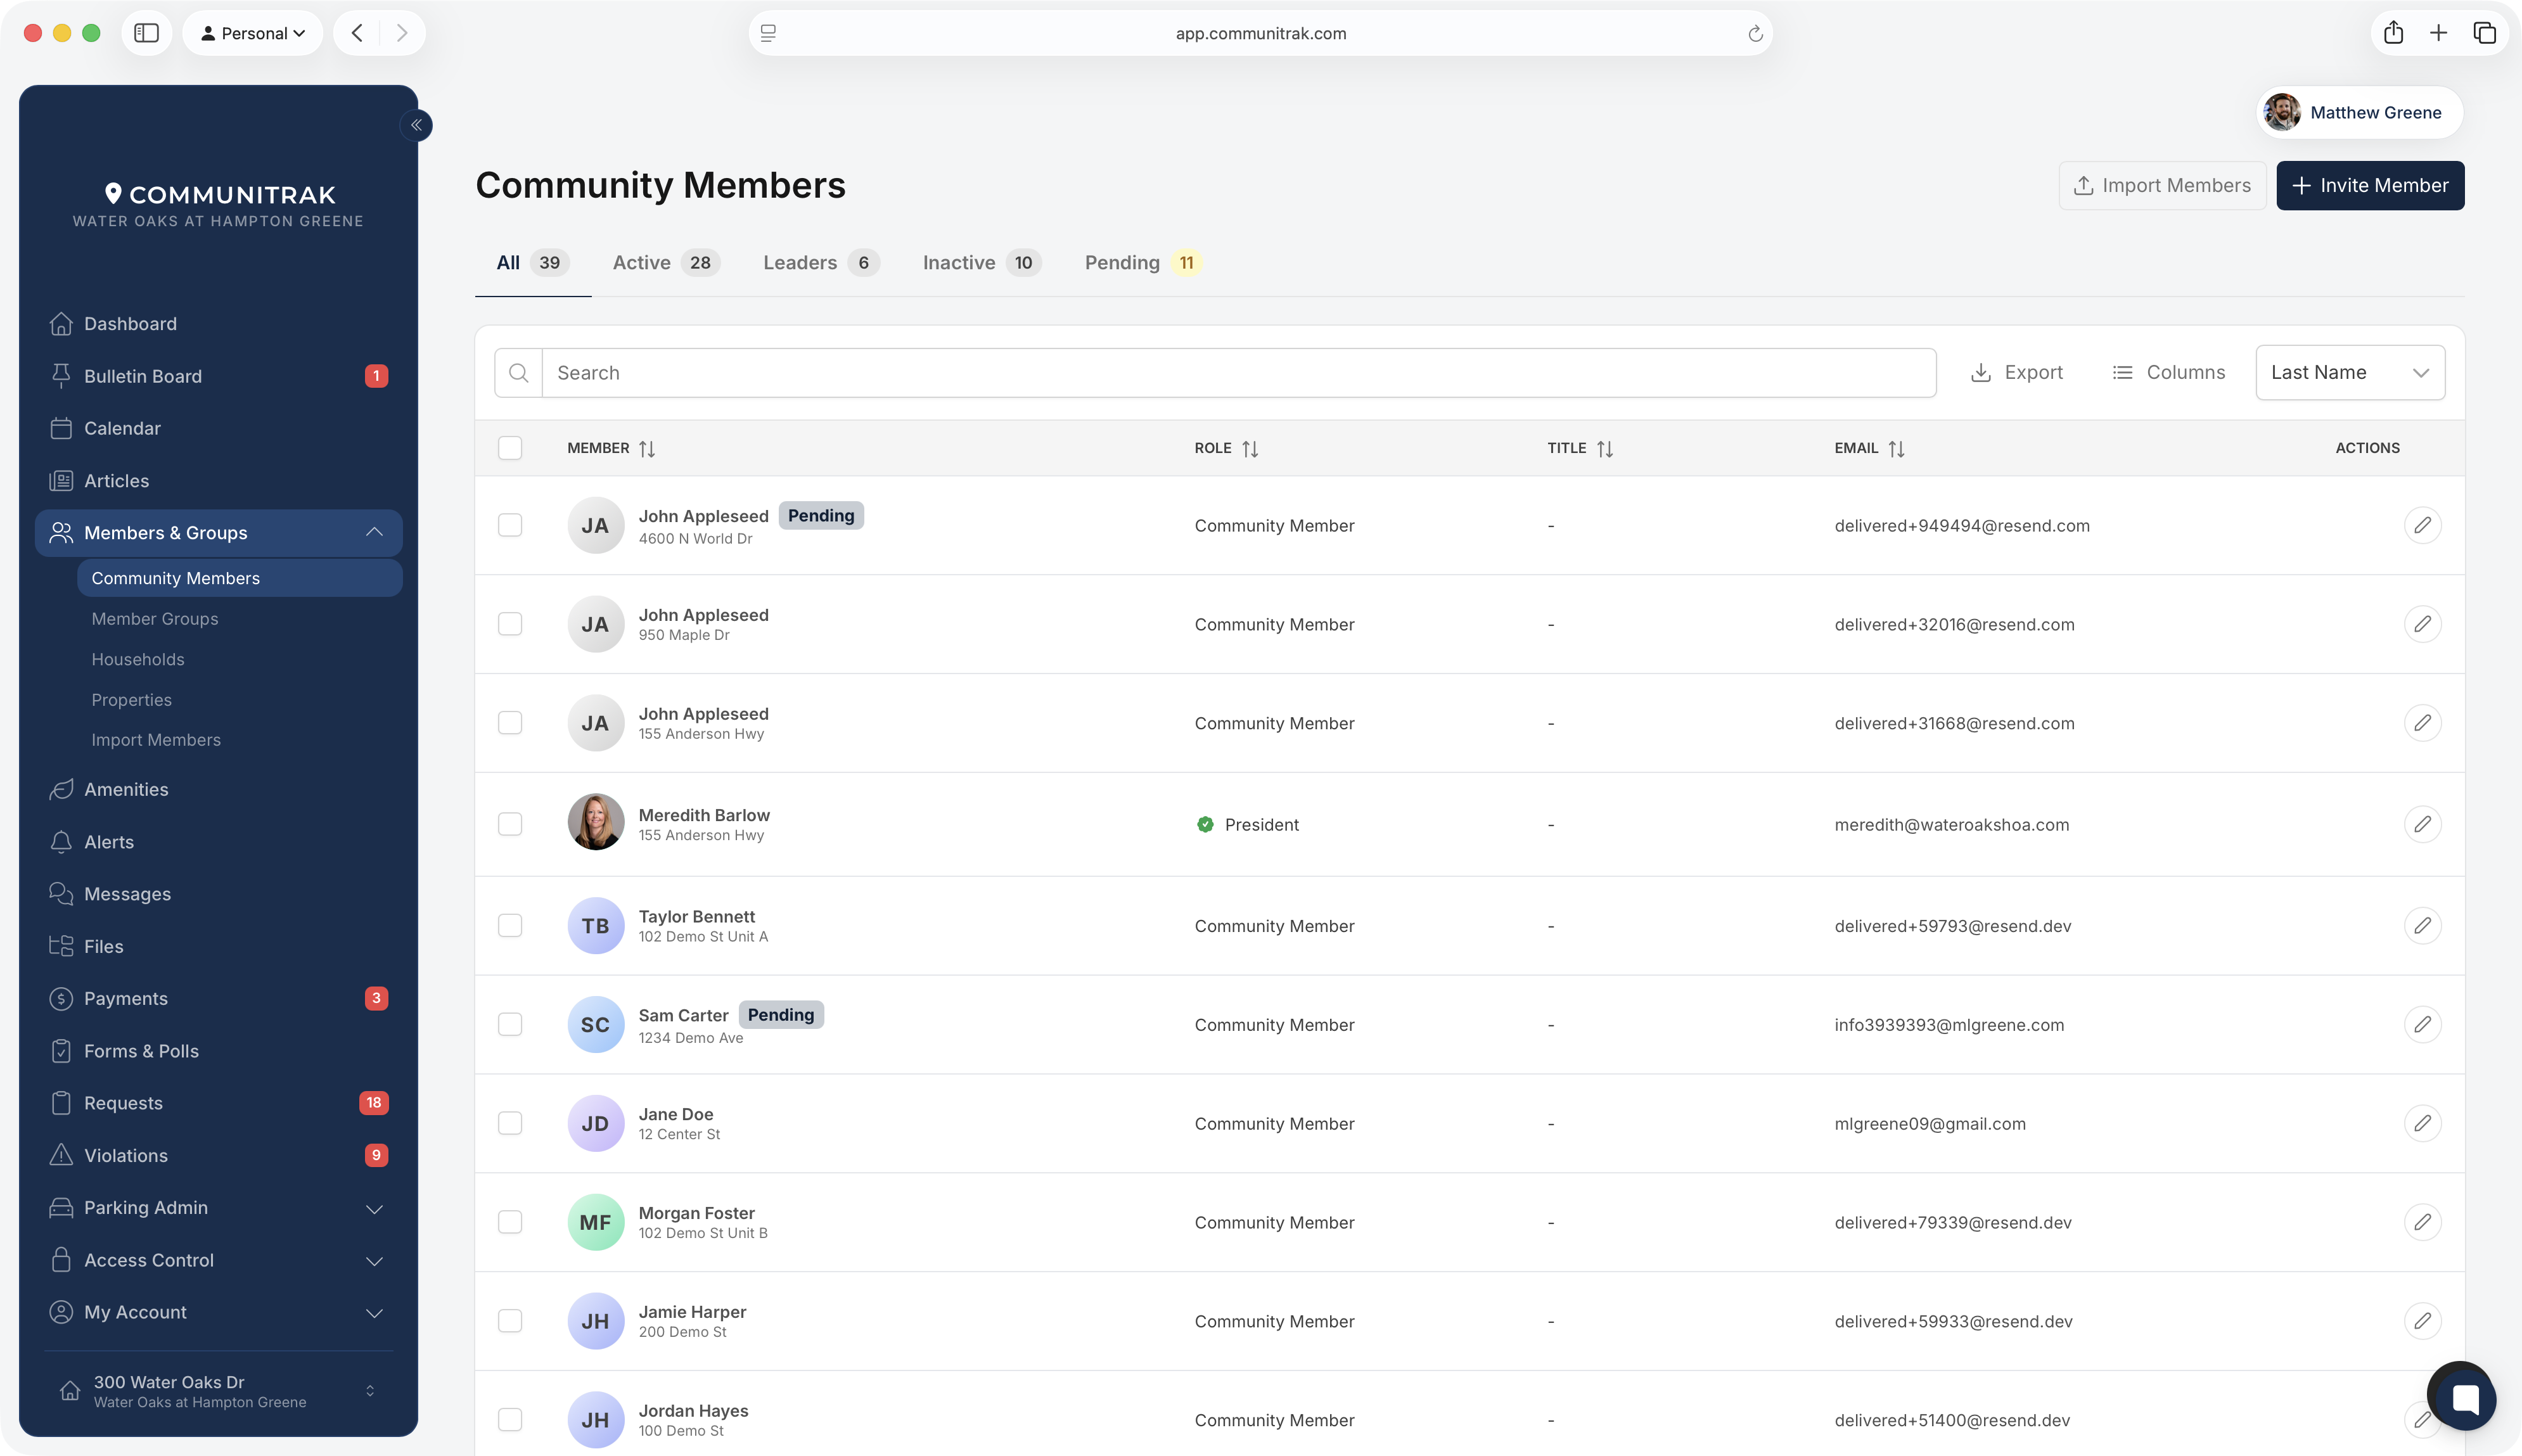
Tabs across the top narrow the list. The count on each tab is the number of people, not properties.
All shows active members, and pending members too if you can see them (see Pending below). Inactive members are left out.
Active shows only members with active accounts.
Leaders shows members marked as community leaders on their profile. Requires the View Leaders permission.
Inactive shows members whose membership, account, or household is inactive. Requires the View Inactive Members or Admin View for Members permission.
Pending shows members who have been invited but haven't activated their account. Requires the View Pending Members or Admin View for Members permission. Without one of them, pending members don't appear anywhere in the directory.
If you can see pending members, they also carry a Pending tag next to their name on the All tab.
The Search box filters by name, address, role, title, email, or phone number as you type. The sort menu orders the list by First Name, Last Name, Address, Role, Title, Email, or Phone.
Click Columns to open Customize Columns and switch Role, Title, Email, and Phone on or off. The Member column (name, photo, and address) and the Actions column are always shown. Your choice applies only to you, on every device. Reset to Default returns to your community's default view, which is set on the Preferences page under Default members list view.
Someone who owns more than one property in the community appears on one row, with their first address and a +1 more (or similar) note you can hover over to see the rest.
Members choose which of their contact details other residents can see. With the Admin View for Members permission, you see every member's email, phone, and address regardless of those choices, and you also see members who have hidden themselves from the directory. Without it, a hidden detail shows as Private and hidden members don't appear.
Click a member's email address to choose between a Communitrak Message and your own email app.

This requires the Change Member Role permission. It works in the table on a computer. On a phone, open the member's profile instead.
Find the member in the table.
Click the pencil icon in the Actions column.
Choose a new role from the dropdown, tick or untick Leader, and update the Title.
Click the checkmark to save, or the X to cancel.
Picking a role ticks or unticks Leader for you, using that role's Leader by default setting as a starting point. Whatever you leave the checkbox on is what saves. A member's leader marking shows as a green badge next to their role name.
Role, title, and leadership belong to the person, so for someone with more than one property in the community, one change applies to all of them.
Leadership grants no permissions. Permissions come from the Community Role. Marking someone as a community leader does change how they're treated:
They carry the leader badge, appear on the Leaders tab, and appear on the Dashboard's Community Leaders card.
They are included when someone messages all leaders at once, and residents can message them even without permission to message other residents.
They always appear in the directory. Their Show Me in Directory setting is locked on.
They count as a board member in the architectural review settings, which warn you when board members, or people in their households, sit on the review committee.
With the Change Member Role permission, a checkbox appears on each row in the table. On the Pending tab, the checkboxes also appear if you can resend invitations (Invite Members and Invite Members via Email). Select one or more members and an action bar appears at the bottom of the screen showing how many are selected. Each button in the bar needs its own permission.
Select the members you want to update.
Click Change Role.
In the Change Member Roles dialog, choose a New Role.
Under Leadership, tick Mark as community leaders to mark every selected member as a leader, or leave it unticked to remove the marking from all of them. Choosing a role sets this checkbox to that role's default.
Optionally enter a Title to apply to all selected members. Leave it blank to keep their existing titles.
Click Update Roles.
The same Admin only rule applies here. If you aren't a Community Admin, you can't pick an admin-level role, and the update is refused if any selected member already holds one.
On the Pending tab, the action bar also has a Resend Invitations button. It requires the Invite Members and Invite Members via Email permissions.
Select the pending members who need a new invitation email.
Click Resend Invitations.
Review the list and click Resend Invitations.
Each member receives a new email with their existing access code. Members without a valid email address are skipped. If members were imported without invitations, use this when you're ready to send their first ones.
Click Invite Member in the top-right corner of the page. This requires the Invite Members permission. The new member appears on the Pending tab until they activate their account. See Inviting and Onboarding New Members for the full steps.
Click Export to download a CSV of the members currently showing, meaning the selected tab plus any search. This requires the Export Members permission.
The file has one row per property membership, so someone with two properties appears twice. Its columns are CMID, Full Name, Lot Number, Street Address, City, State, Zip, Email, Phone, Role, Title, Household Status, and Member Status. Without Admin View for Members, details a member keeps private read Hidden.
Choose a tab, and search if you only want some members.
Click Print.
In the Print Directory dialog, tick the Columns to include. Name and address always print.
With Admin View for Members, decide whether to keep Respect residents' privacy settings ticked. Untick it to print contact details residents chose to hide. The printout then says so at the top.
Click Print.
The printout includes every member on the tab, not only the current page of the list.
Clicking a member's name or photo opens their profile. See Viewing and Managing Member Profiles.
Communitrak Support staff never appear in your member list or exports.
Importing a member list is handled by Communitrak Support. If you'd like to import members, reach out to Communitrak Support.
If you have questions or need help, chat with Communitrak Support from any page using the messenger icon in the bottom-right corner.
