Articles is where your community keeps its policies, guidelines, how-tos, and other reference material. This article covers turning Articles on, writing and scheduling an article, choosing who can see it, editing, unpublishing and deleting, and organizing categories. For finding and reading articles, see the article on using Articles.
Each part of Articles is its own permission, granted per role:
Create Article: can write and publish articles, see and edit their own drafts and unpublished articles, delete their own, and see scheduled articles before they go live.
Manage Articles: can edit, delete, and unpublish anyone's article, and sees every article, including drafts, unpublished articles, and articles restricted to other roles.
Manage Article Categories: can create and delete categories.
Turning the module on or off requires the Update Community Preferences permission. Some options may be unavailable or appear differently depending on your level of account access.
Click Community in the main navigation menu.
Click the Preferences tab.
Turn on the Articles toggle.
Articles then appears in the main navigation menu for everyone in your community. Turning it off hides it again, and your articles are kept.
Click Articles in the main navigation menu.
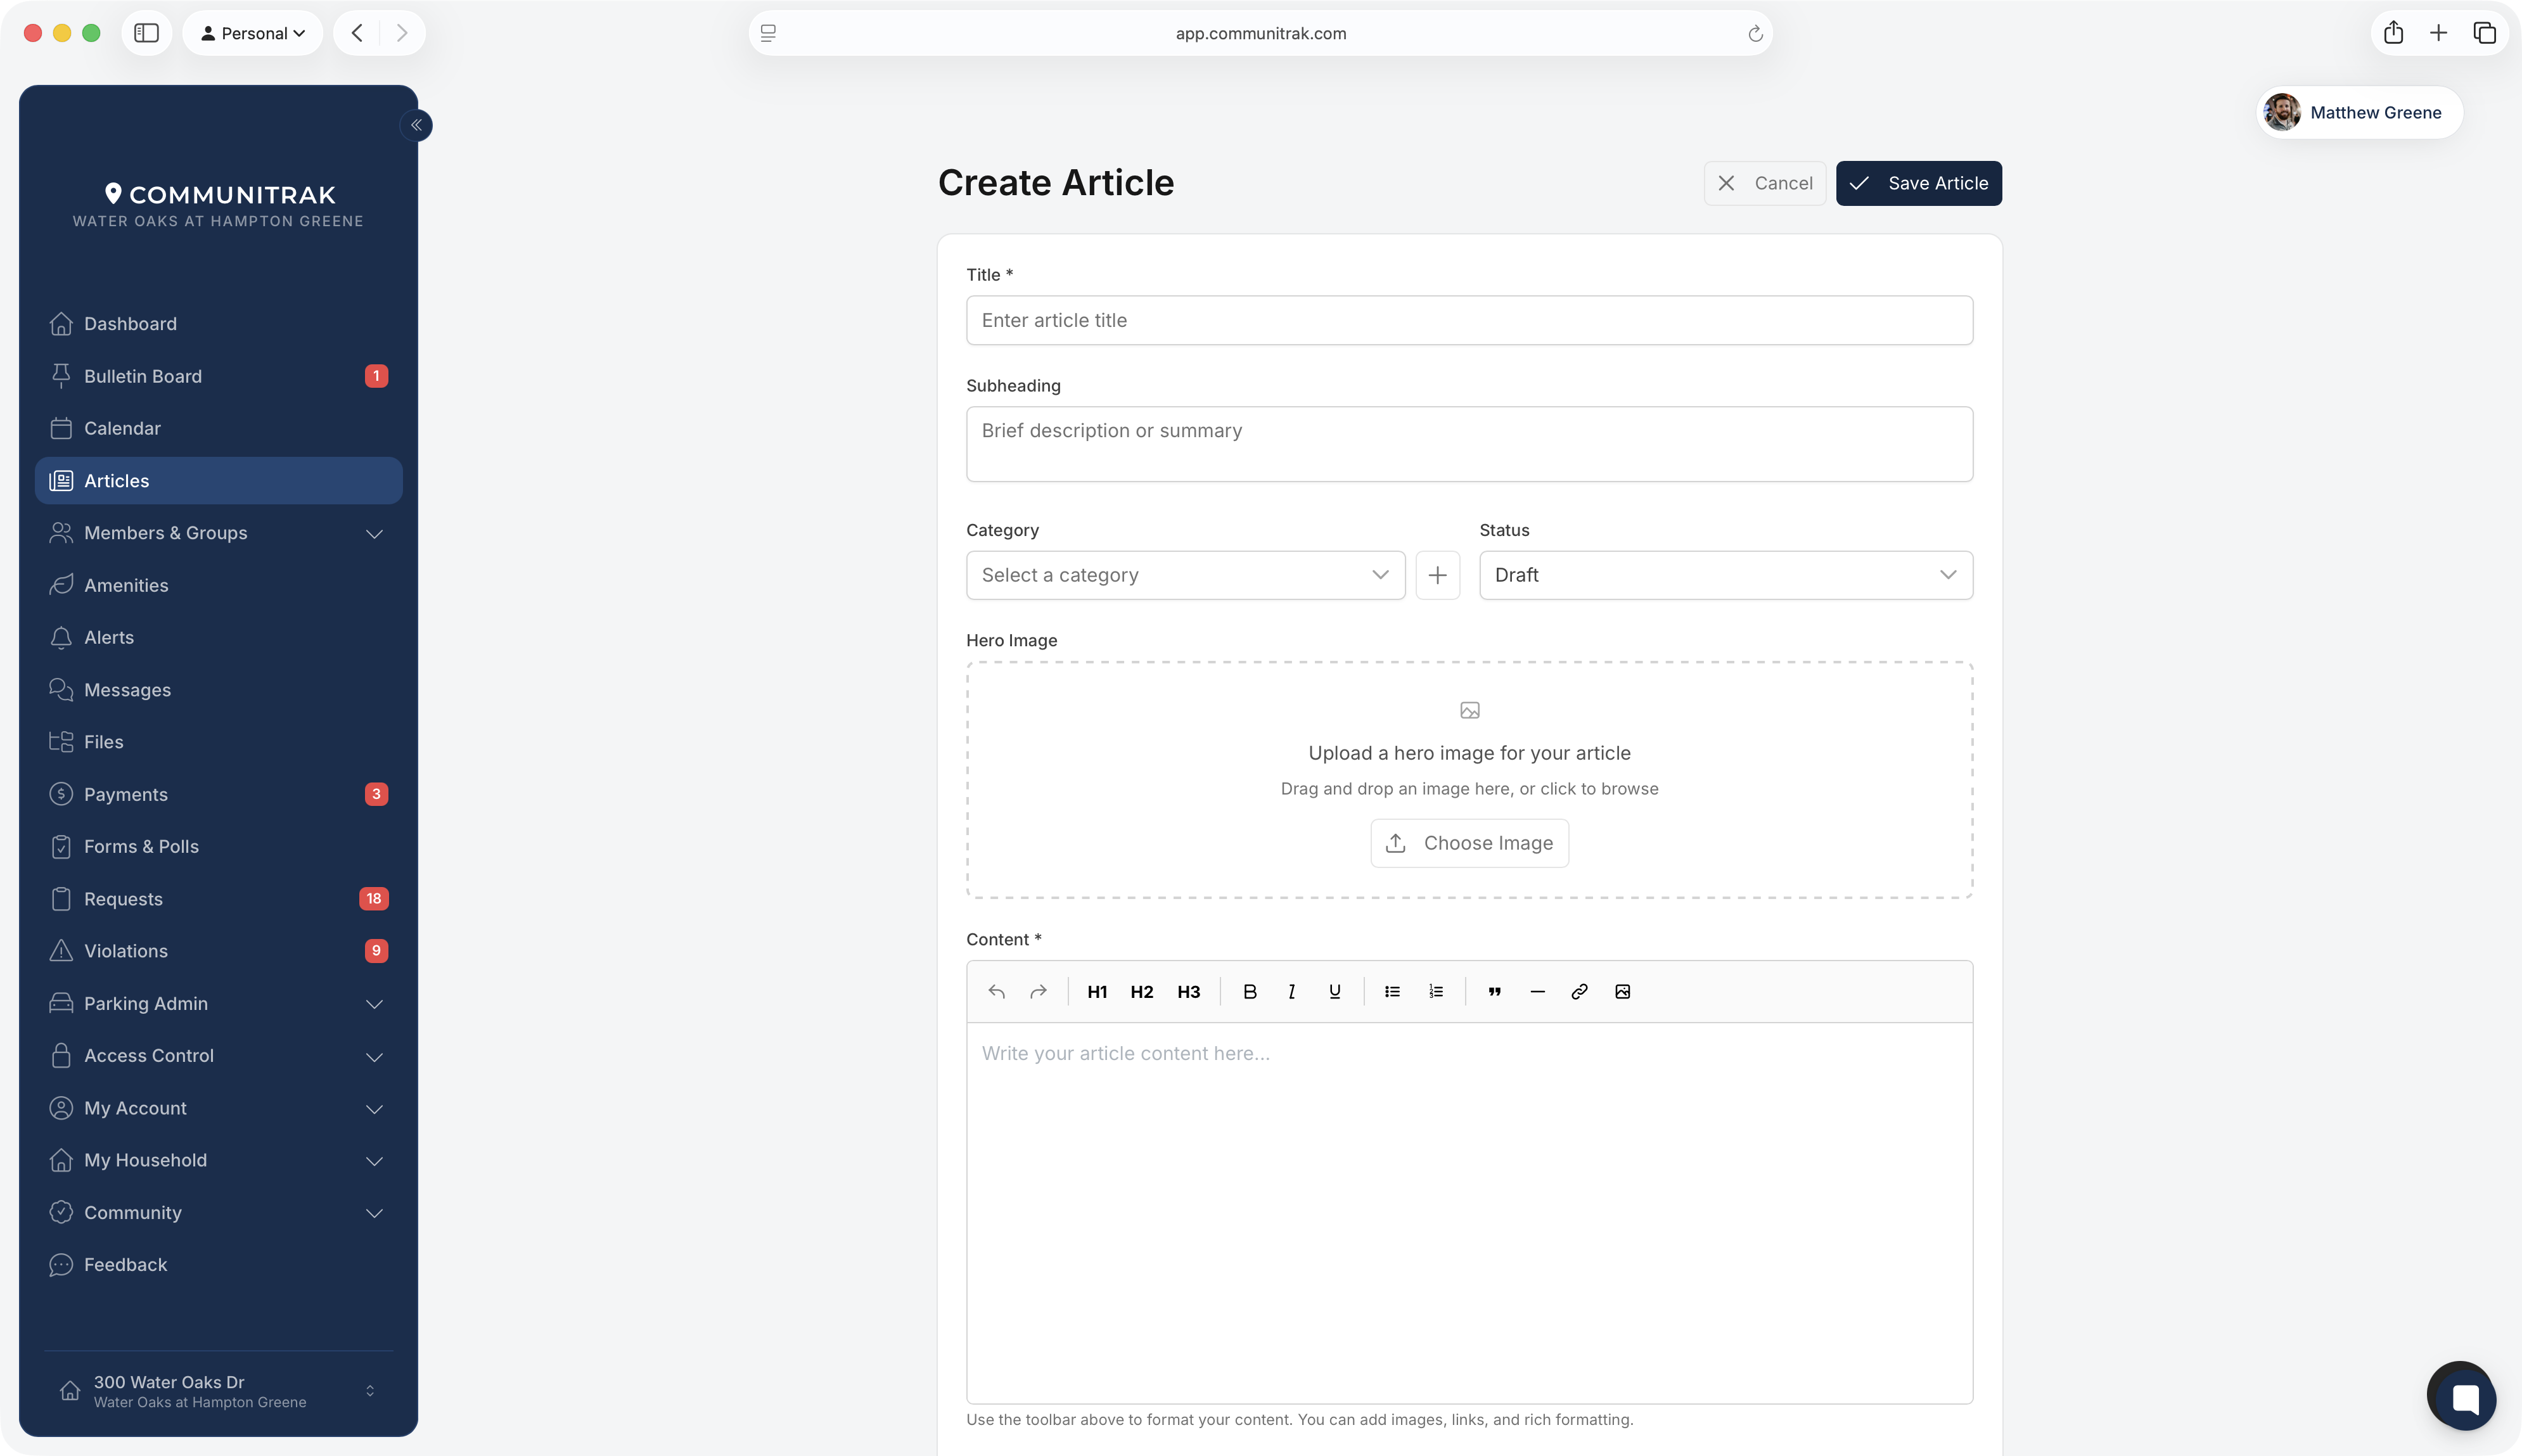
Click New Article. On a phone, tap New.
Enter a Title.
Optionally enter a Subheading. It appears under the title on the article's card and at the top of the article.
Choose a Category, or leave it at No Category. If you have Manage Article Categories, you can click the + button next to the dropdown to create a category without leaving the page.
Choose a Status. New articles start as Draft. Choose Published when it's ready for residents.
If you chose Published, leave Publish Date blank to publish as soon as you save, or pick a future date and time to schedule it (see below).
Optionally add a Hero Image: drag an image onto the upload area or click Choose Image. JPG, PNG, GIF, and WebP files up to 10 MB work. Once it uploads, you can add a caption, or click Remove Image to start over.
Write the article in Content. The toolbar has headings, bold, italic, underline, lists, quotes, links, images, and alignment.
Under Article Options, leave Show article author checked to sign the article with your name and photo, or uncheck it to publish without a byline.
Under Article Visibility, choose who can see it (see below).
Click Save Article.
The article opens once it's saved. Title and Content are required.

Draft: saved, but residents can't see it.
Published: residents can see it, starting on its publish date.
Unpublished: hidden from residents but kept, so you can publish it again later.
Under Article Visibility, choose one:
Public - visible to all members: everyone in your community can read it.
Restricted - only visible to specific roles: check each role that should see it. Members whose role isn't checked won't see the article in the list, and its link won't open for them.
Roles that have Manage Articles are always checked and can't be unchecked. They're marked (Always visible because of role permissions). Once you save, the article's page lists the roles that can see it next to the eye icon.
As the author, you can always open your own article, even if you leave your role unchecked.
Set Status to Published.
In Publish Date, pick the date and time it should go live. Times are in your community's time zone, which is shown below the field.
Click Save Article.
Until then, the article's card shows Scheduled and the date it publishes, and the article's page shows a Scheduled Article banner. Only people with Create Article or Manage Articles can see it in the meantime. At the scheduled time, it appears for residents on its own.
Publishing an article doesn't notify anyone. To let residents know about it, open the article, click Copy Link, and post the link on the Bulletin Board or in a message. Anyone who opens it and isn't signed in is asked to sign in first, then taken straight to the article.
Open the article.
Click Edit Article. On a phone, tap the pencil icon.
Make your changes.
Click Save Article.
Editing a published article keeps its original publish date and adds an Updated date to the article's page. Publishing an Unpublished article again dates it to the day you republish it.
To take an article down but keep it, edit it, set Status to Unpublished, and save.
To remove it for good:
Open the article.
Click Delete. On a phone, tap the trash icon.
Click Delete in the confirmation.

On the Articles page, click Manage Categories. On a phone, tap Categories.
Review the list. Each category shows how many articles it holds.
To add one, click New Category, enter a Category Name, and click Create.
To remove one, click its trash icon. If it holds articles, choose a category under Move articles to:, then click Delete.
Every community starts with two categories marked Default, Announcement and Update. They can't be deleted. Category names must be unique, and there's no rename: to rename a category, create the new one, then delete the old one and move its articles across.
Your own drafts and unpublished articles appear in your list, with their status on the card. To see only those, use the Draft or Unpublished option in the Status filter. People with Manage Articles see everyone's.
You can edit and delete articles you wrote while your role has Create Article. Editing or deleting someone else's takes Manage Articles.
Articles don't have comments.
If your community's account is read-only because of a billing issue, New Article, Edit Article, and Delete are disabled until the account is back in good standing. Residents can still read articles.
If you have questions or need help, chat with Communitrak Support from any page using the messenger icon in the bottom-right corner.
